p0 — Optogenetic intensity calibration
Goal: find out how strongly the fly responds to the optogenetic LED at different brightness levels, while it watches a moving visual pattern. Think of it as a dose–response check: sham (no light) → increasing light levels → sham again.
Files: p0_opto_intensity_short.yaml (about 2.6 min) and p0_opto_intensity_full.yaml (about 10.3 min). Runs on the fly-on-ball rig; open-loop (no FicTrac closed-loop needed).
Open in Arena Studio
These links open the shared protocol from the private course repository in the Run view and force safe mode.
| Version | Link |
|---|---|
| Short | Open p0 short |
| Full | Open p0 full |
If the browser is not signed in to GitHub yet, Arena Studio will stay in safe mode and ask you to sign in before loading the protocol.
P0 is the course intro protocol. It is not intended to be the main high-N dataset, but it is useful to run once per genotype/line when possible so each team sees how Arena Studio, visual stimuli, LED timing, and run logging fit together.
Course sequence: first practice tethering with CS x w1118 flies. Then run P0 on the optogenetic line assigned for that group’s next experiment. This calibration comes before P1 or P2, so the group has a sensible LED range before collecting its main data.
Pattern previews
| Drifting grating | Sweeping dark bar |
|---|---|
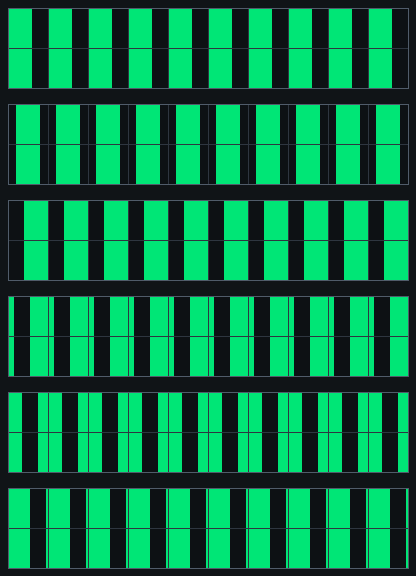 | 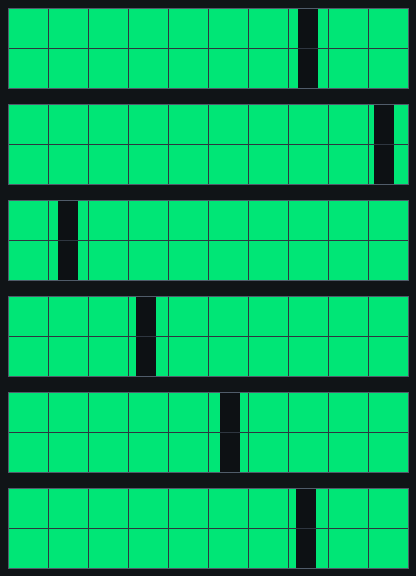 |
What the fly sees
Two visual stimuli alternate:
- Grating — a square-wave grating (36°/cycle), drifting clockwise then counter-clockwise. Drives the optomotor (following) response.
- Bar — a 10-pixel dark bar on a bright background that sweeps front-to-back (and the reverse), passing through straight-ahead.
Each block runs both, once CW and once CCW.
What the LED does
Every trial has the same shape: the visual pattern starts, then the LED turns on for a fixed window in the middle of the trial, then off.
- Grating trials: 6 s long, LED on from 2–3 s.
- Bar trials: 3 s long, LED on from 1.25–1.75 s (centered on the front).
The blocks step the LED through levels while keeping everything else identical:
| Block | LED level |
|---|---|
sham_pre | 0% (no light — baseline) |
level_1 | 1% (just-on) |
level_2 | 5% |
level_3 | 10% |
level_4 | 20% |
level_5 | 40% |
sham_post | 0% (no light — baseline again) |
The sham blocks at the start and end run the exact same LED command timing at 0%, so any change you see across levels is the light, not the timing.
Because the levels are named level_1 … level_5, the actual percentages can be adjusted in one place in the YAML if the calibration changes.
What to watch
- Does the fly’s turning/walking change when the LED comes on?
- At which level does a response first appear, and does it saturate?
- Compare
sham_prevssham_post— the fly should behave similarly at both if it stayed healthy through the run.
Timing
Short version ≈ 2.6 min (7 blocks × 1 rep, 1-second blanks between trials). Full version ≈ 10.3 min (same design, 4 reps).
Use short first as a sanity check. Do not tune LED levels during the student short run unless an instructor asks you to; the point is to decide whether the fly and rig are usable.
Analysis plots
Planned first-look plots:
- Mean forward velocity and turning around LED onset for each LED level.
- LED dose-response summary by genotype and fly.
- Sham-pre versus sham-post comparison to check whether behavior changed over the run.
References
- Strother JA et al. (2017). The emergence of directional selectivity in the visual motion pathway of Drosophila. Neuron 94:168-182. https://doi.org/10.1016/j.neuron.2017.03.010
Updated 2026-07-10 01:47 ET. Source: protocols/shared/p0_opto_intensity_*.yaml.