Prerequisites
You must have cloned the G4 Display Tools repository as described in the Generation 4 Software Setup.
Getting Started
Many features of the G4 Designer and Conductor require that certain settings be configured correctly. Even though some features will work without them, your experience with the G4 Display Tools will be smoother if you configure your settings first. You will rarely need to change them after setting them up once. Follow this tutorial to ensure your settings are correct before proceeding to use the Designer or Conductor.
Configuration file
Before you can even open the G4 Designer, you must update one thing - the path to your G4 Configuration file.
Open the file G4_Display_Tools/G4_Protocol_Designer/G4_Protocol_Designer_Settings.m in MATLAB, for example by typing edit G4_Protocol_Designer_Settings into the MATLAB Command Window. An early line (usually line 3) of this file should look similar to the following:
Configuration File Path: C:\Program Files (x86)\HHMI G4\Support Files\HHMI Panels Configuration.ini
Double check that the file exists at this location as this is required to open the Protocol Designer. It is also possible to have this file outside the standard location, for example it could be /Users/taylorl/Desktop/HHMI Panels Configuration.ini (on a Mac). If the location is not correct, replace the current path with the correct path to your HHMI Panels Configuration.ini file. This is the only change you should make to the filet. Please save and close the file when you are done.
Note: There should be exactly one space between the ‘:’ and the first character of your path. Additionally there should be no trailing spaces at the end of your path. Please ensure these two things are true before saving and closing the file.
Open the G4 Protocol Designer
Make sure that G4_Display_Tools and all its sub-folders and files are on your MATLAB path (for details and verification see Assembly -> Software). Then type G4_Experiment_Designer into your MATLAB Command Window and hit Enter. Alternatively, you could browse to the file G4_Display_Tools/G4_Protocol_Designer/G4_Experiment_Designer.m, open it in MATLAB, and hit Run.
A window like the one below will open. If it does not, or if you get a MATLAB error, see the G4 Designer Manual for more help on errors and debugging.
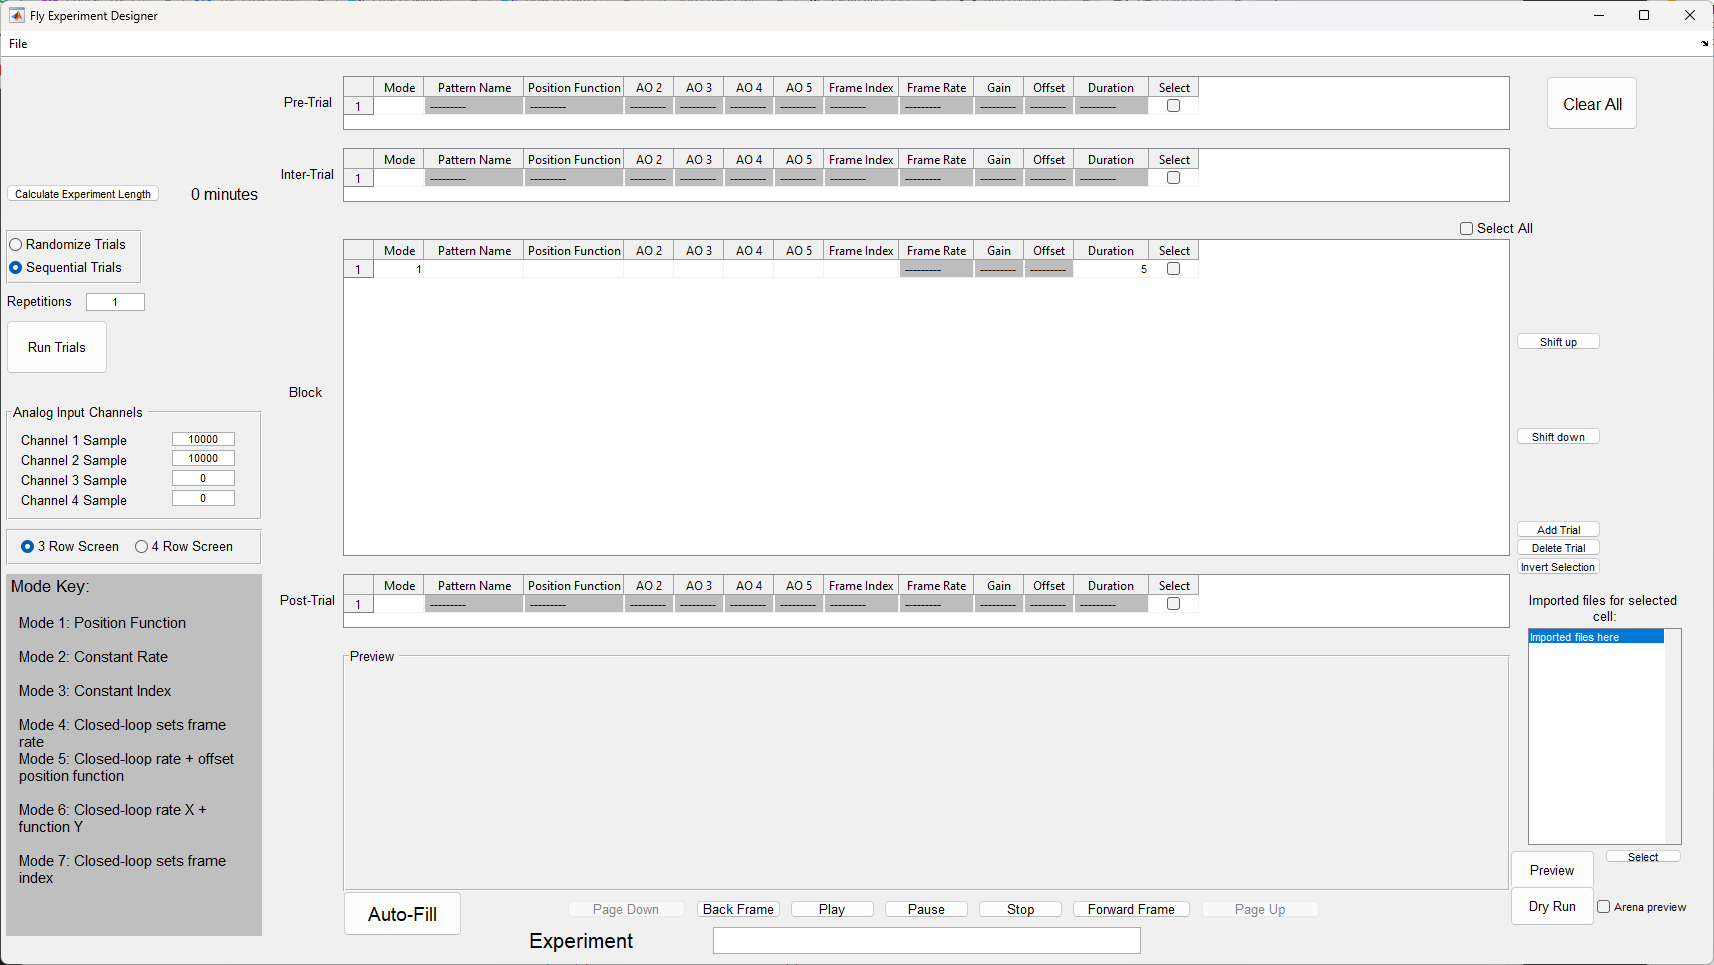
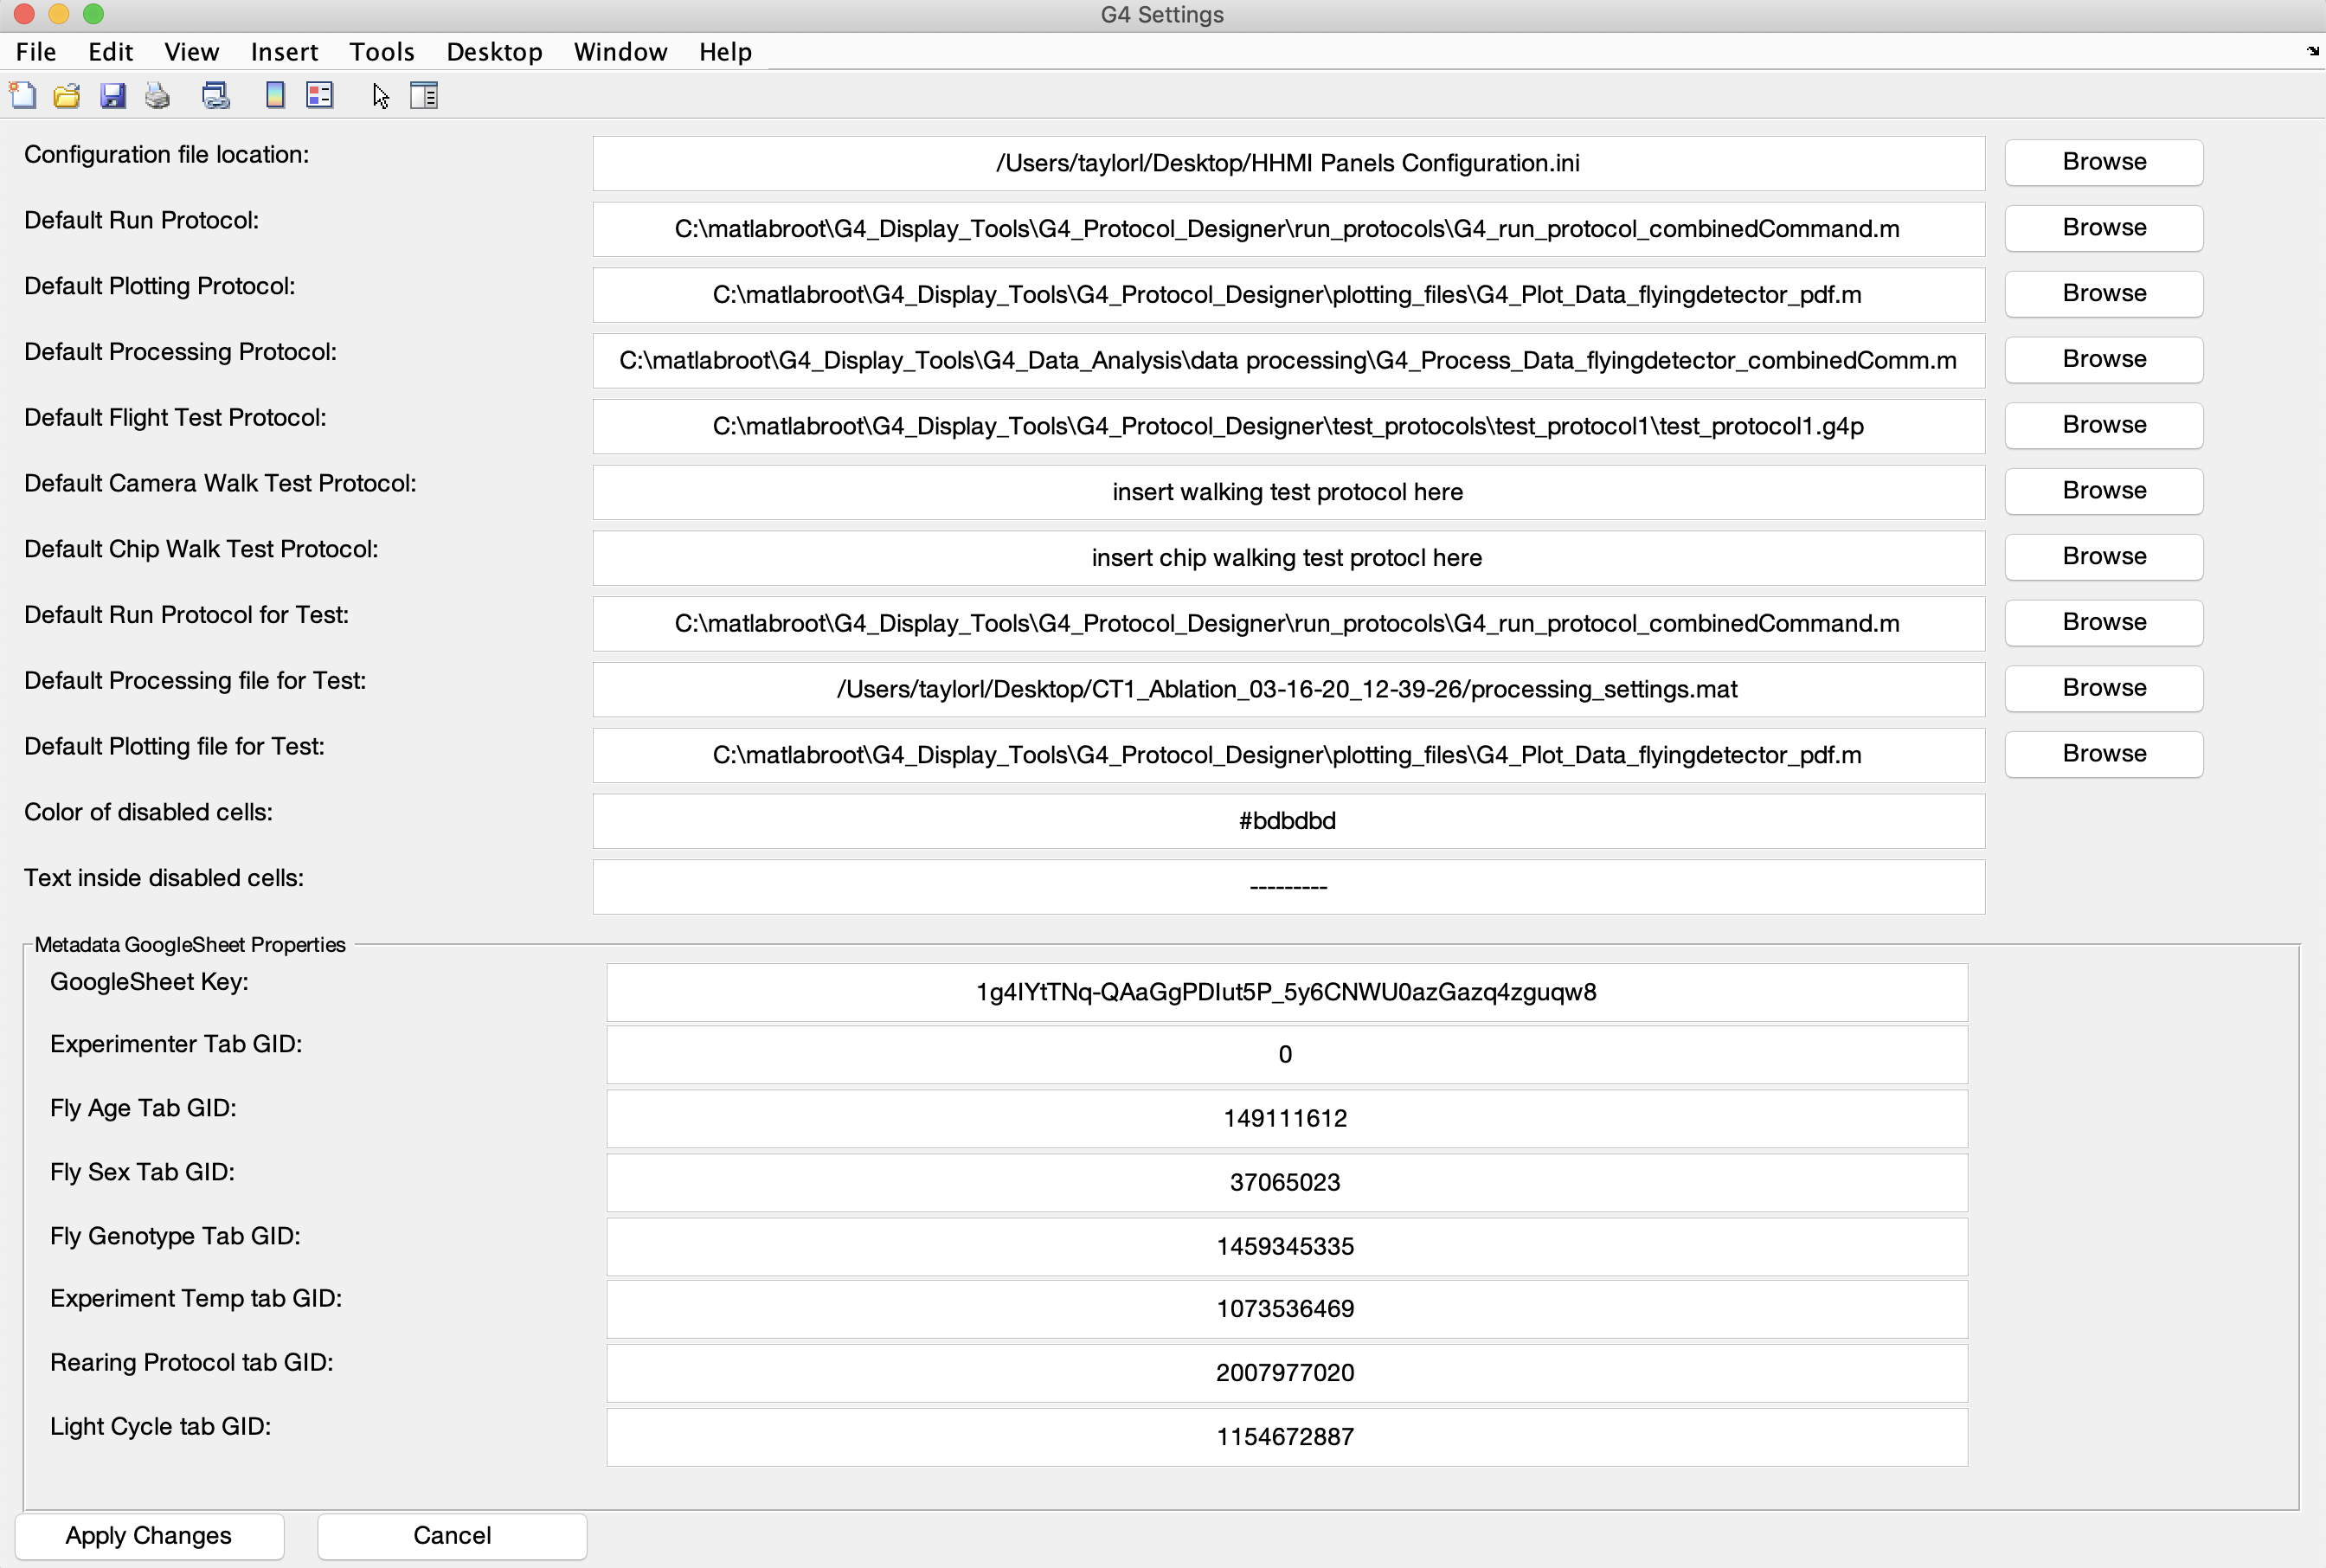
Click File → Settings in the upper left hand corner of the G4 Protocol Designer window. A second window should pop up that looks like this:
The settings
The G4 Settings GUI that just opened is a graphical interface to the configuration file G4_Display_Tools/G4_Protocol_Designer/G4_Protocol_Designer_Settings.m. It makes the configuration easier and does some basic checks about the validity of the settings. In addition, here we provide more details for each field in the settings window and what it means.
-
Configuration file location This field should contain the correct path to your G4 Main Host configuration file. That is the same file we just updated above. This file needs to be correctly configured before starting the G4 Protocol Designer, therefore we needed to set it earlier. If you want to use a different arena or setting you can always use this G4 Settings GUI to switch between different files.
-
Default Run Protocol A run protocol refers to an
.mfile which defines the structure of how an experiment is run on the screens. Refer to the Run Protocol Tutorial for more details. While we provide several examples, the default atG4_Display_Tools/G4_Protocol_Designer/run_protocols/G4_default_run_protocol.mshould be sufficient for most use cases. -
Default Plotting Protocol This field only matters if you want to use the G4 Data Analysis tools to run automatic data analysis when an experiment is over (see there for more details). If you have create a data analysis settings file, which determines how your automatic data analysis will be run, put the path to that settings file here. This may change from experiment to experiment, feel free to update it when you need to. However, this only controls the default settings file and you can choose a different settings file when you run your experiment.
-
Default Processing Protocol Like the plotting protocol, this field only matters if you will be using the G4 Data Processing tools to automatically process your data into datasets after an experiment (see there for more details). If you have created a settings file for your data processing which you want to run at the end of each experiment, put the path to that settings file here. Like the previous field, this only defines the default and you can choose a different one when actually running the experiment.
-
Default Flight Test Protocol This refers to an experiment protocol (a
.g4pfile) which would be used as a test run for your flight experiments. It is common to run a quick test with just a few patterns before a full experiment to make sure your fly is responding as expected and responses look normal. We have provided a simple test protocol like this, located inG4_Display_Tools/G4_Protocol_Designer/test_protocols/test_protocol1/test_protocol1.g4p. This test protocol folder contains all the patterns and files commonly used in the Reiser lab protocols. You may find it more useful to customize a short test protocol and provide the path to the.g4pfiles here. -
Default Camera Walk Test Protocol This is the location for the walking test protocol and otherwise the same as the previous field. The field either requests a
.g4pfile or can contain the string insert walking test protocol here. -
Default Chip Walk Test Protocol This is the same as the previous two fields, but should contain a test protocol for chip walking experiments instead of flight.
-
Default Run Protocol for Test If you have a test protocol in any one of the previous three fields, you’ll need to designate a run protocol to run it. This run protocol serves exactly the same purpose as the Default Run Protocol, but applies to all test protocols instead of your actual experiment protocol. In most cases this will be the same run protocol as your Default Run Protocol, but there is an option to further customize it. This run protocol should be a path to an
.mfile. We provide a default for you atG4_Display_Tools/G4_Protocol_Designer/run_protocols/G4_default_run_protocol.m. -
Default Processing file for Test Similarly to the Default Processing Protocol, this field defines the processing protocol for the test protocols and is only required if at least one of them is set. While customizable, this is most likely the same
.mfile used for the main experiment. -
Default Plotting file for Test Similarly to the Default Plotting Protocol, this field defines the plotting protocol for the test protocols and is only required if at least one of them is set. While customizable this field most likely contains the same
.mfile used for the main experiment. -
Color of disabled cells: This field defines a color in the six-digit form of a hexadecimal code. It defaults to
#bdbdbd, which is a grey color. You can change this if you’d like to change the background color of table cells in the G4 Protocol Designer when they are disabled. For example, in certain modes, a condition does not take a position function. If this is the case, the table cell for position functions will be drawn in the background color defined here (default: gray). You can change the fill color here if you like. -
Text inside disabled cells The text that will fill disabled table cells in the G4 Protocol Designer. By default, they will turn gray and be filled with dashes, ——–. You can change this to any string if you prefer, such as disabled or ////////.
The bottom section contains a panel called Metadata Google Sheets Properties. Please refer to the Setting up your Google Sheets tutorial for an explanation of these settings.
What if I don’t have some of these?
That’s okay! Although some of the settings are required such as the Configuration file location, the Default run protocol, the Color of disabled cells, the Text inside disabled cells and some Metadata settings (see tutorial for details). Some of these and other field provide default values or they can be left blank. The GUI might warn you about missing values, but you are always free to ignore these warnings.
Note: When you click Apply Changes the software will check some of the values for validity. If a field is empty or contains a path that doesn’t exist, you will get a pop up warning you about it. If you don’t care about that field click OK to close the warning boxes. The settings will still be saved.
Once your settings are how you want them, just click Apply Changes, close the window (File -> Close{:.gui-txt} or X) and you are done! If you want to continue the G4 Protocol Designer tutorials, have a look at the Metadata tutorial.